Making Hokey Pokey
100g sugar
1 Table of water
2 tablespoons of golden syrup
1 teaspoon of bicarbonate of soda
Method:
1. Put the ingredients except for the bicarbonate of soda into a saucepan and place on low heat.
2. Stir until all the sugar has dissolved. Raise the heat slightly so that it bubbles, and stir occasionally until you cannot feel any sugar at the bottom of the pan
3. Take off the heat.
4. Add bicarbonate of soda and stir!
5. Watch what happens-it should all forth up with bubbles in the pan
6. Pour out into your tinfoil sheet
7. Allow cooling.
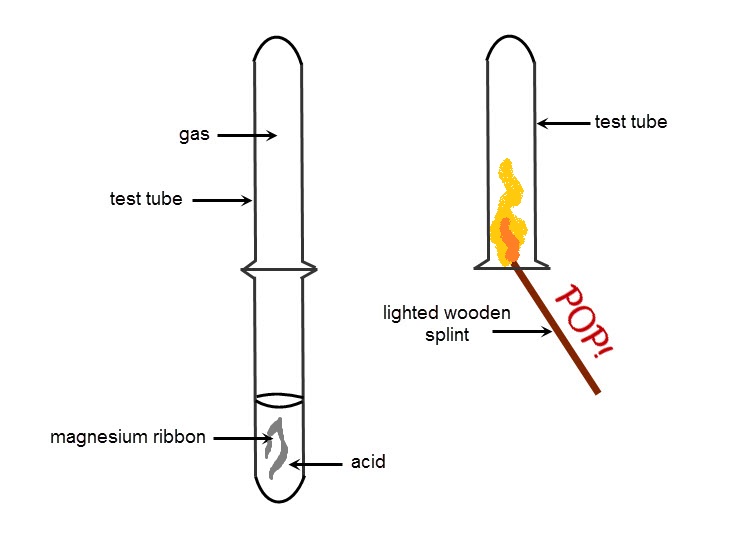
Observation:
Here is what happened.

Observation:
Here is what happened.